How to Protect Strawberries From Birds Without Harming Them
Contents[hide]
- 1. Confirm Birds Are Actually Damaging Your Strawberry Plants
- 2. Why Exclusion Beats Scare Tactics Alone
- 3. Time the Cover Around Bloom, Not Just Ripening
- 4. Match the Frame to How You Grow Strawberries
- 5. Choose Plastic Mesh You Can Keep Taut and Inspect
- 6. Check the Bed Daily While Protecting Strawberries From Birds
- 7. Layer a Rotating Set of Visual Deterrents While You Build
- 8. Troubleshoot Gaps, Sag, and Repeat Damage
- 9. When the Damage Isn’t From Birds: Checking for Other Pests
- 10. Keep the Method Humane and Legal
- 11. Common Questions About Protecting Strawberries From Birds
- 12. Your Plan to Protect Strawberries From Birds, Start to Finish
Quick Answer
The most reliable way to protect strawberries from birds is a low, supported cover with netting kept taut and sealed to the ground, opened at one flap for daily picking and resealed every time. Reflective tape, decoys, and other scare devices only work as a rotated, temporary backup, and the cover should stay open during flowering so bees can still reach the blossoms.
In this article, you'll learn how to protect strawberries from birds without harming them. We'll cover bird netting, low covers, and humane deterrents.
Confirm Birds Are Actually Damaging Your Strawberry Plants
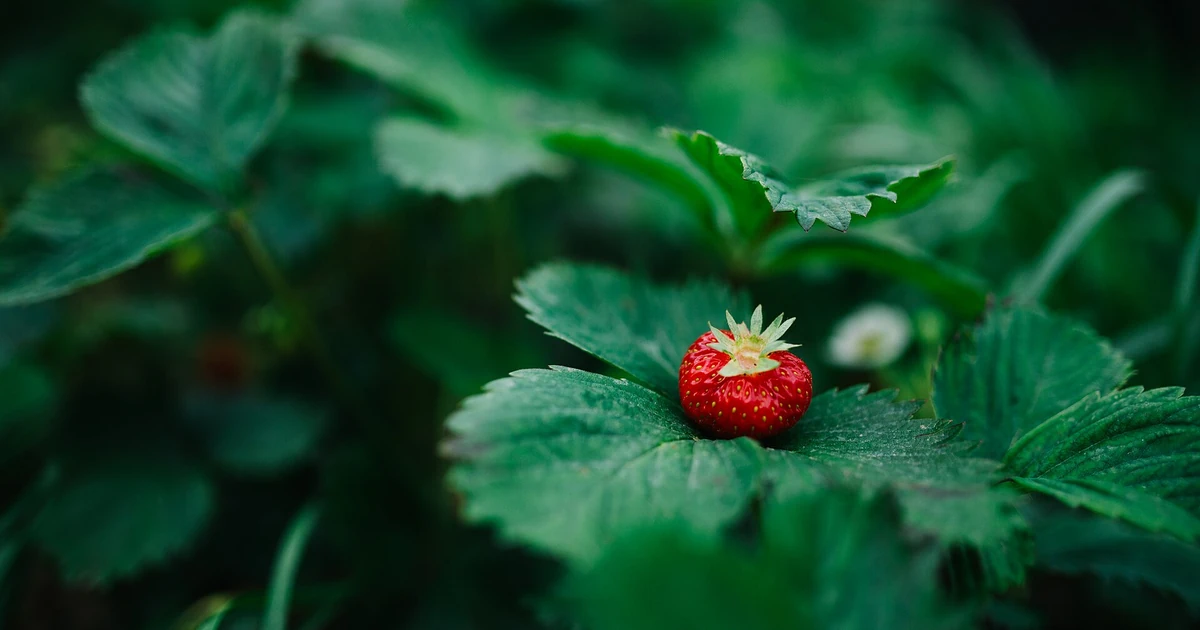
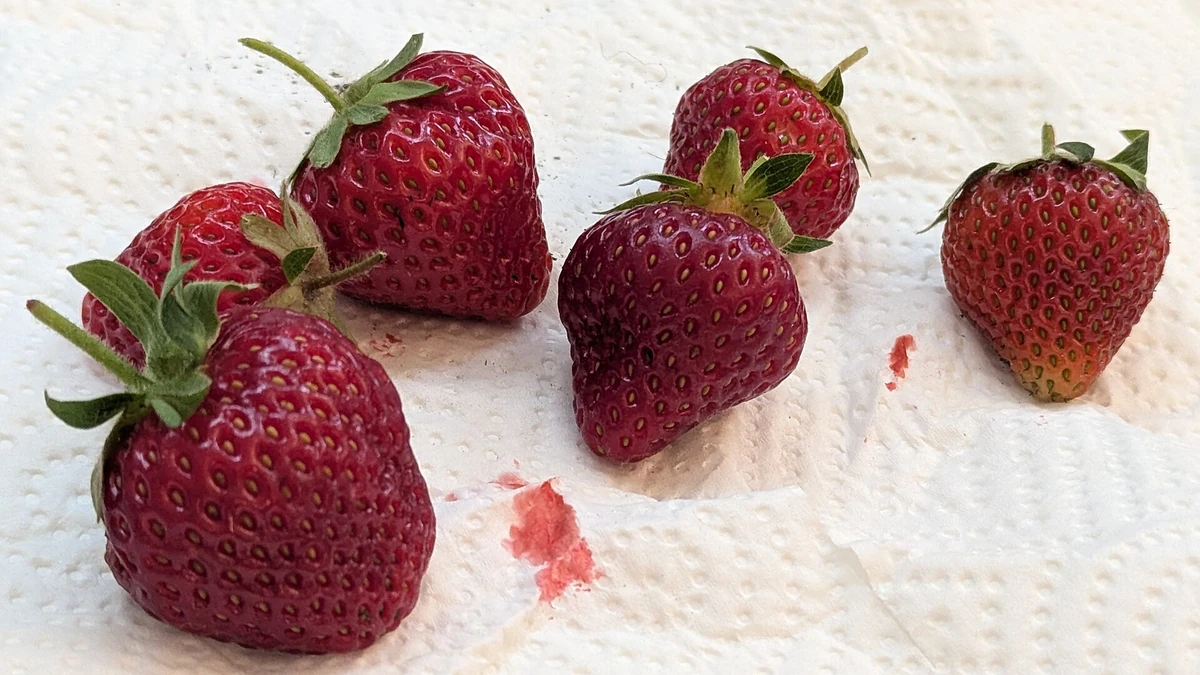
Before you build anything, make sure birds are the problem you’re actually solving. Penn State Extension notes that birds can cause serious losses in strawberry crops and garden beds, and netting is one of the standard ways growers respond to protect strawberries. Bird damage usually looks like a clean peck or a single bite out of the side of the berry that faces up toward the sky, often on fruit that is just turning red. You may find the green cap and stem left behind on the plant with the berry itself gone, or catch birds actually feeding in the bed early in the morning before you’re up.
Many bird species will go after ripening strawberries, and while the exact culprit varies by yard and season, the solution is the same regardless of which one shows up. Birds aren’t the only animal after your strawberries, though. Oregon State University Extension lists birds, deer, squirrels, and mice as common nuisance pests in a home strawberry patch, and recommends row covers or netting when fencing the whole garden isn’t practical. If what you’re seeing looks more like ragged gouges with a slime trail, a whole berry carried off, or plants stripped down to bare stems, you’re likely dealing with one of these other animals, and the solution looks a little different. The section on non-bird damage further down walks through those signs in more detail.
Why Exclusion Beats Scare Tactics Alone
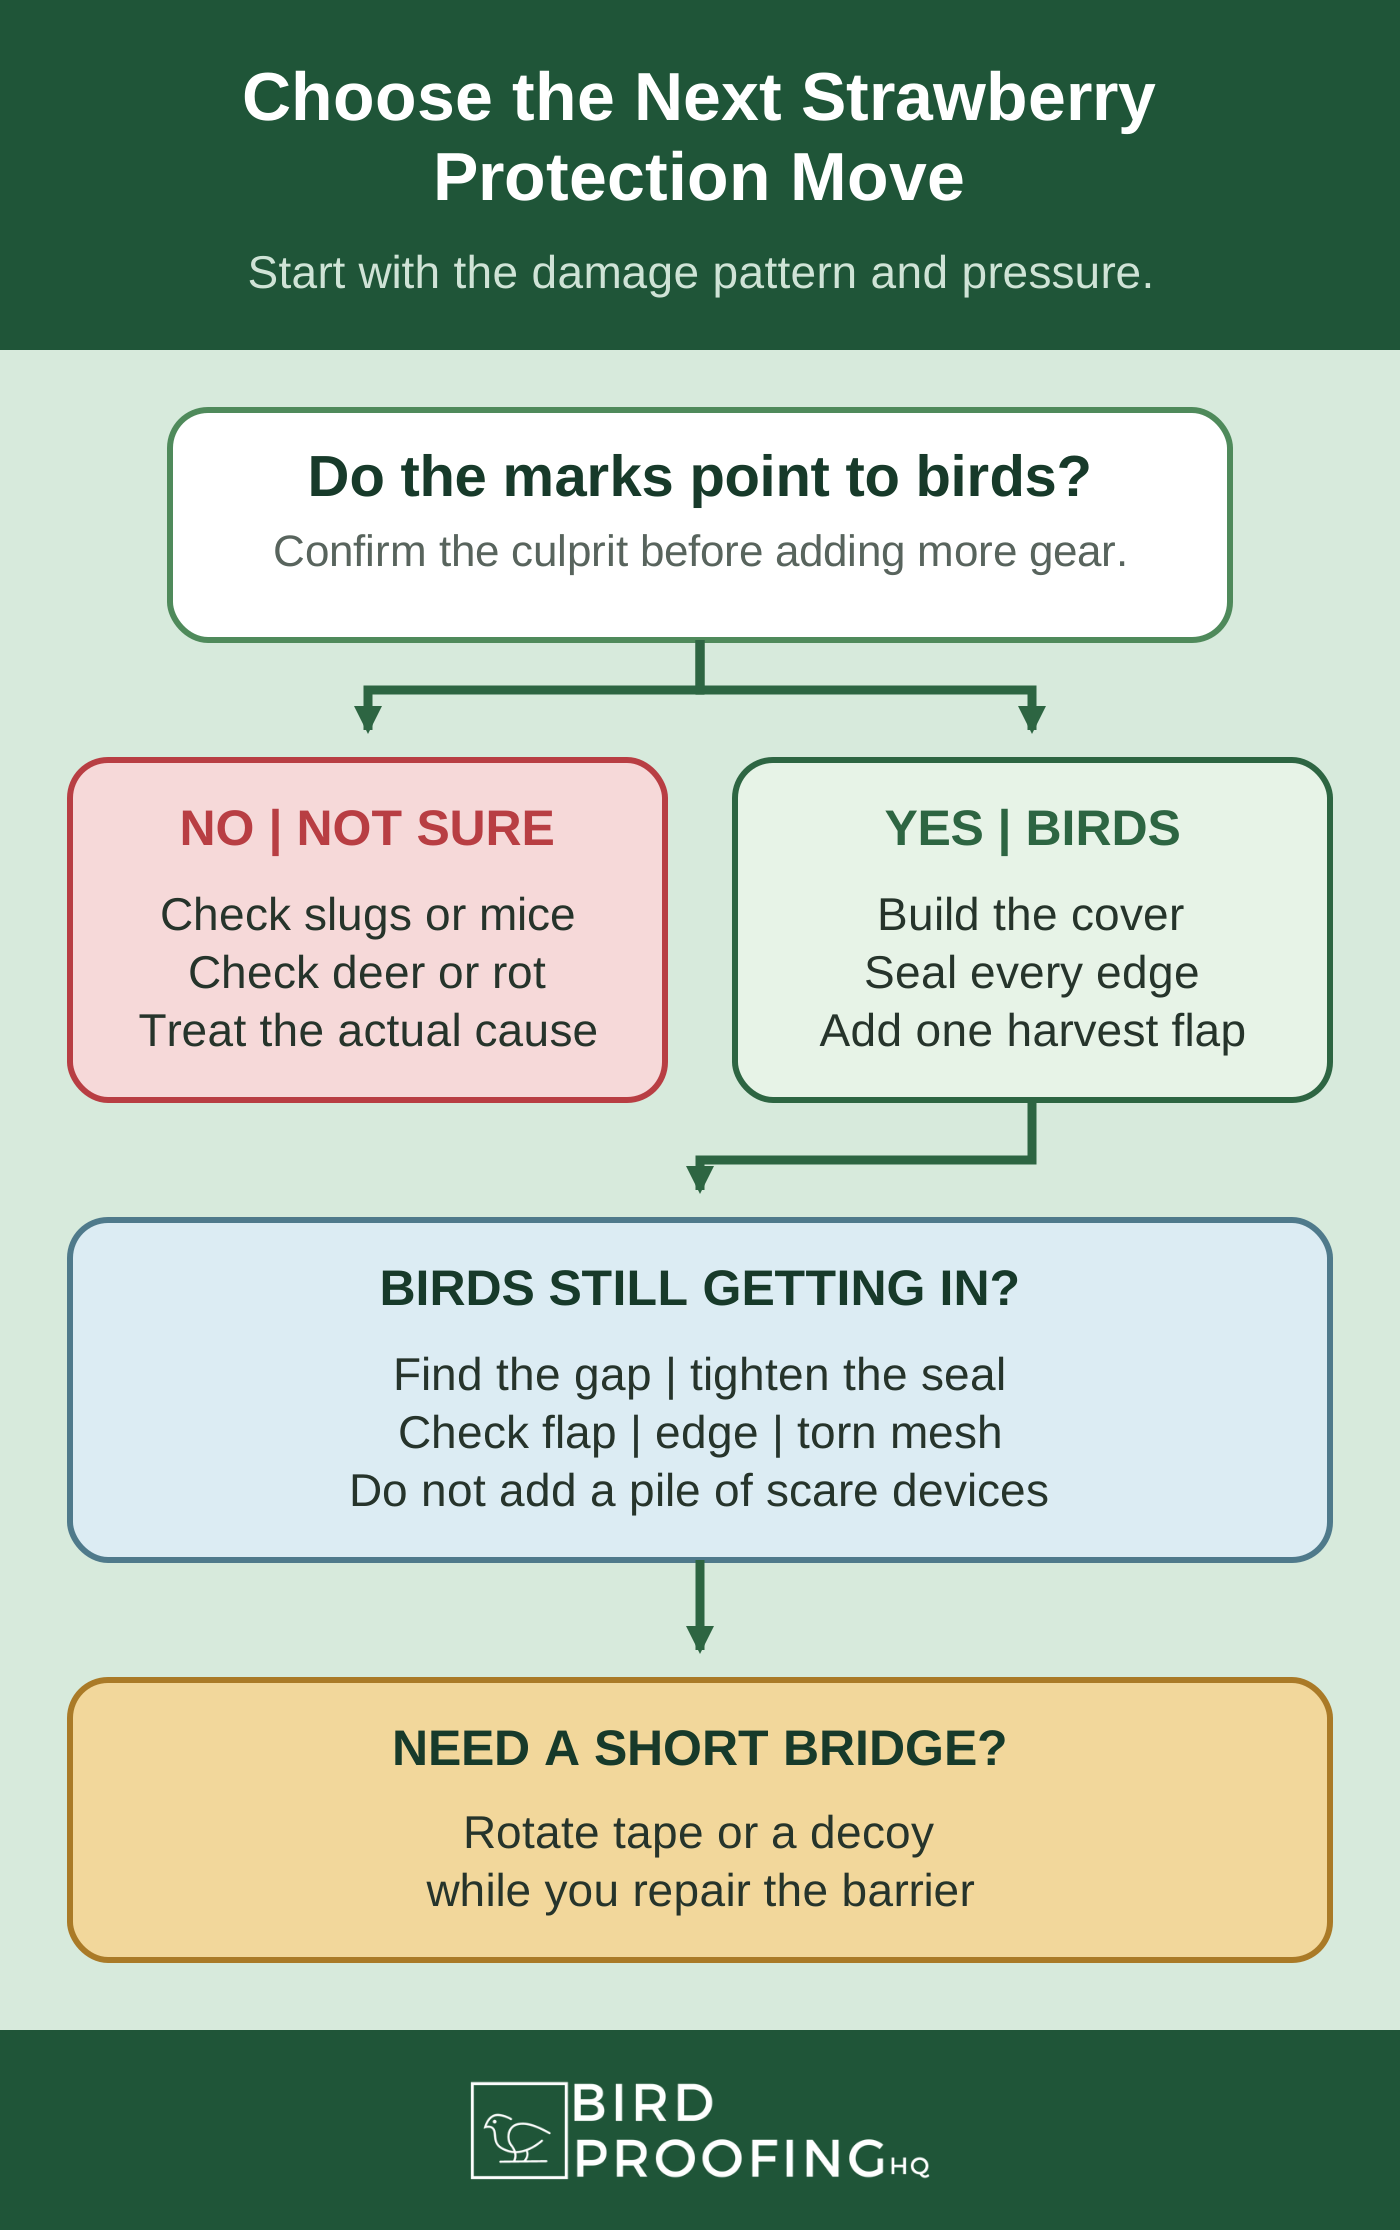
Once you’ve confirmed birds are behind the damage, the verdict is straightforward. Penn State Extension calls netting the most effective way to reduce bird damage on small fruit crops, and for a home strawberry bed, a physical netting barrier is the most dependable option you have. Reflective tape and decoys can slow birds down for a while, but they aren’t built to hold up as your main line of defense. In practice, protecting strawberries from birds comes down to picking one primary method and using everything else as a support for it.
A supported, sealed barrier beats the two shortcuts people usually try first. A loose sheet of bird netting just draped over the plants tends to sag onto the foliage, which lets birds land on top and still reach fruit pressed against the mesh from underneath. A standalone scare device only works until the birds figure out it never actually does anything. What holds up is netting lifted off the plants on a support and sealed at the base, so there’s no way in for hungry birds looking for an easy meal of ripe berries. A supported, sealed cover is still the most reliable way to protect strawberries from birds without harming them.
It’s fair to weigh the tradeoff before you build one, since uncovered strawberry plants give birds easy access as the fruit ripens. Penn State Extension points out that netting has real costs: money up front, labor to install, and less casual harvest access than an open bed. The upside is that netting can be reused for years if you take it down and store it carefully at the end of the season, which spreads that setup work across many harvests instead of paying it every year. For most home gardeners protecting a small bed or a modest strawberry patch, that trade is worth it the first season the netting saves an entire crop.
Time the Cover Around Bloom, Not Just Ripening
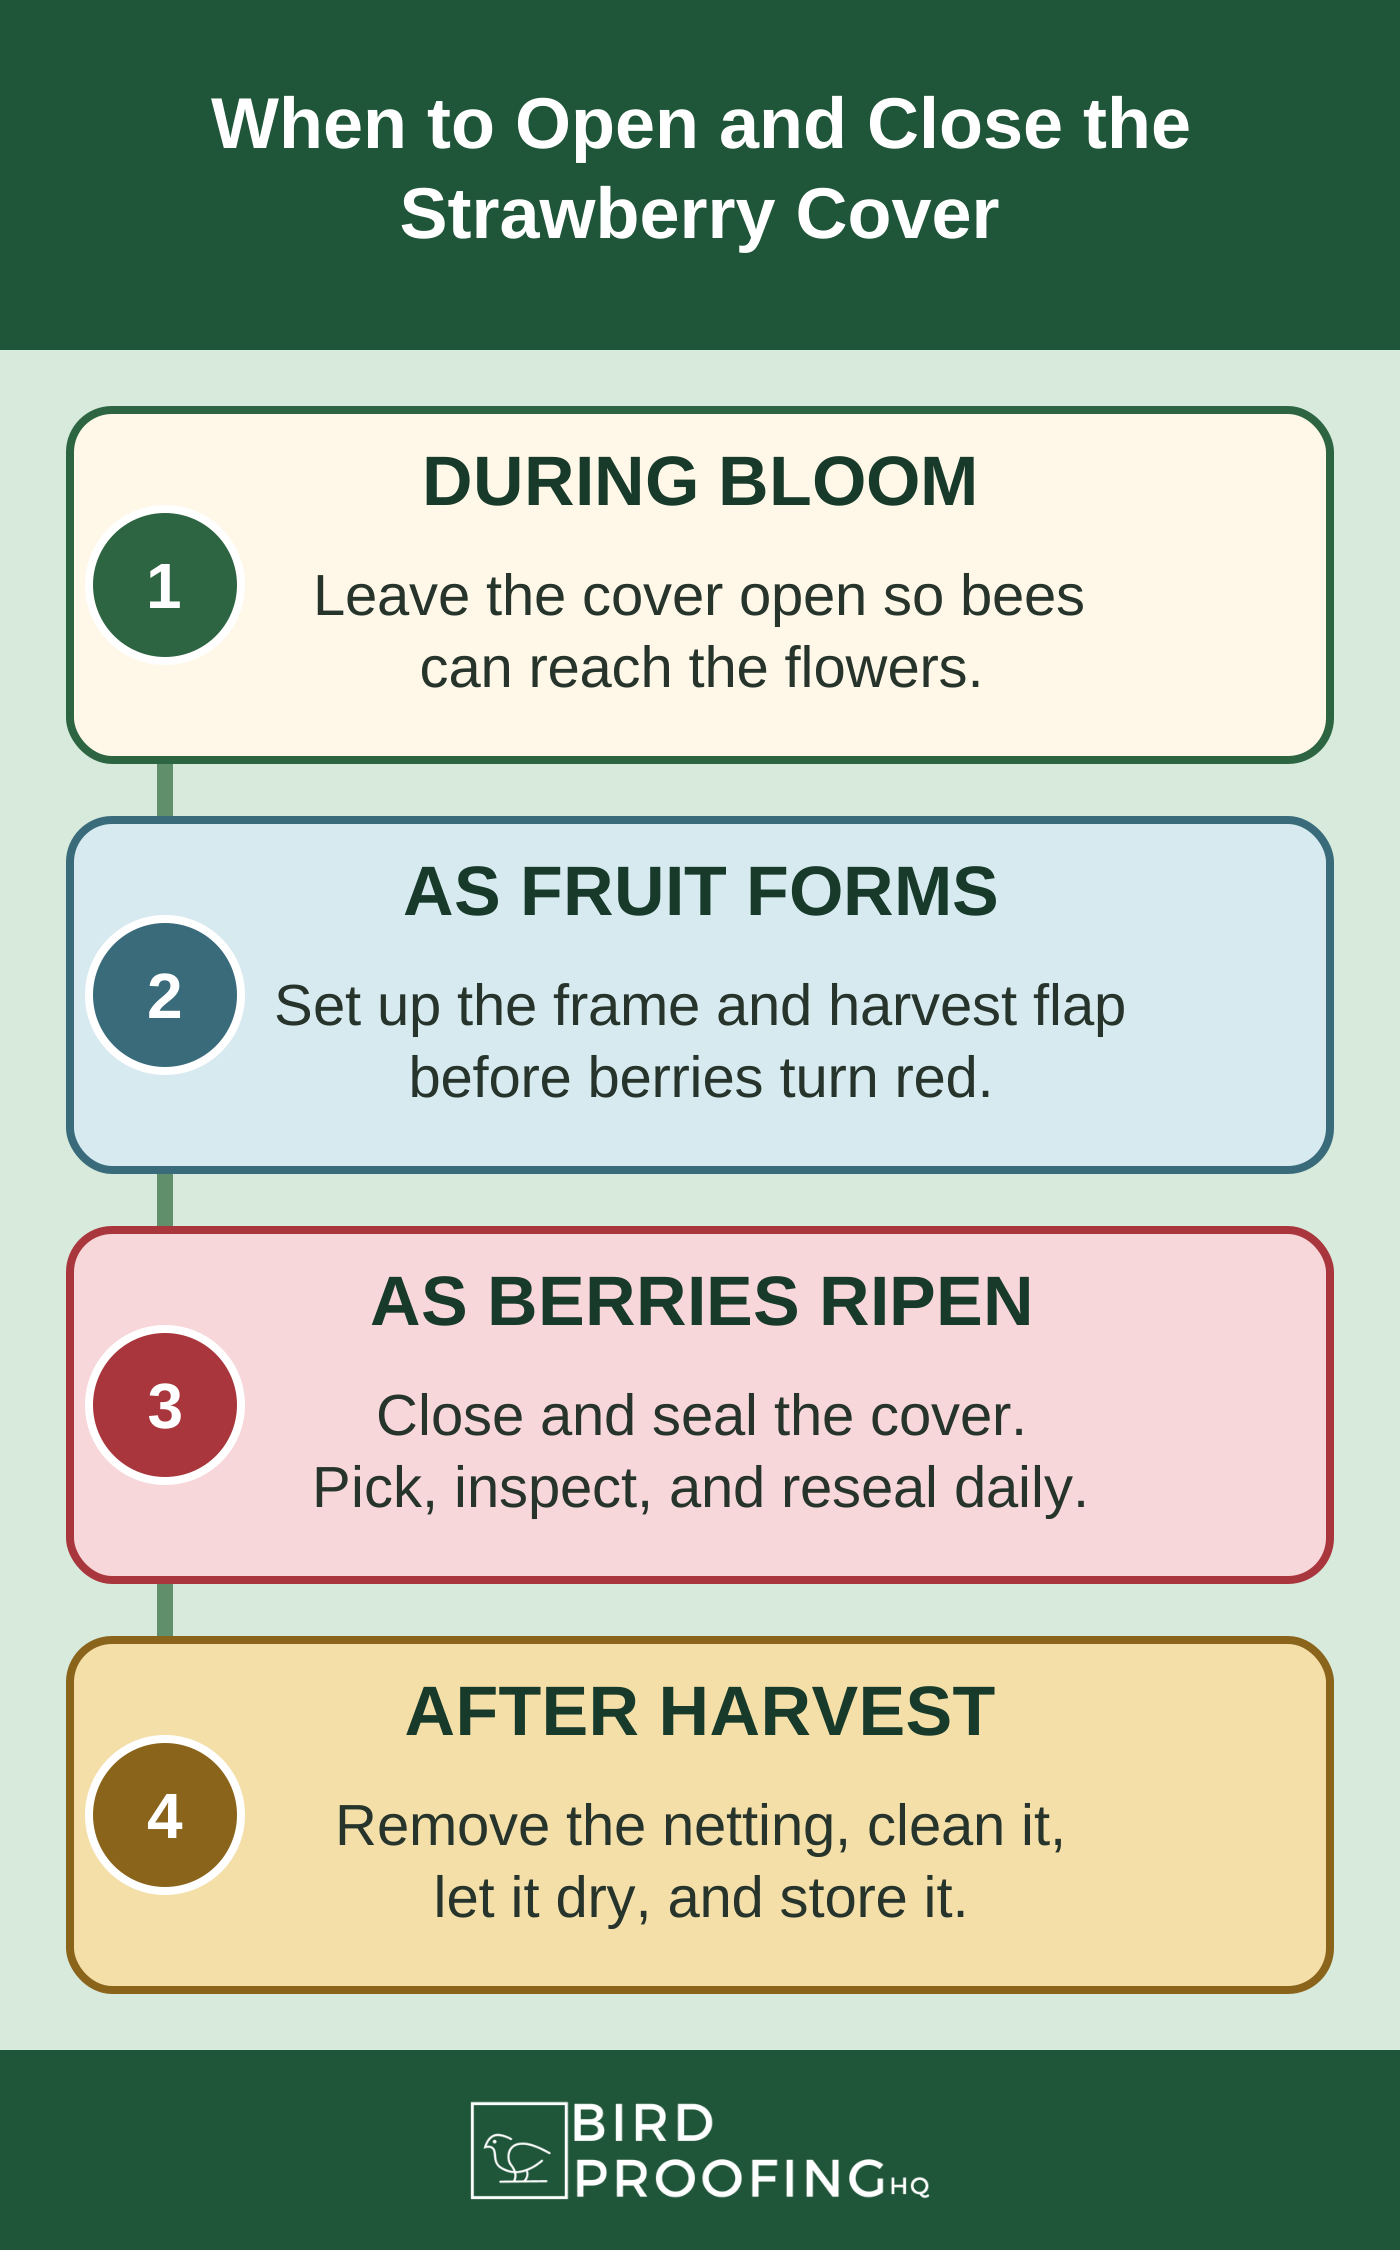
Timing matters as much as the cover itself. Oregon State University Extension advises opening covered growing structures while strawberry plants are flowering, so pollinators can reach the blossoms and complete pollination. Applied to a strawberry bed under netting, that means keeping flowers accessible to bees and closing the barrier once you’re actually protecting fruit rather than blossoms.
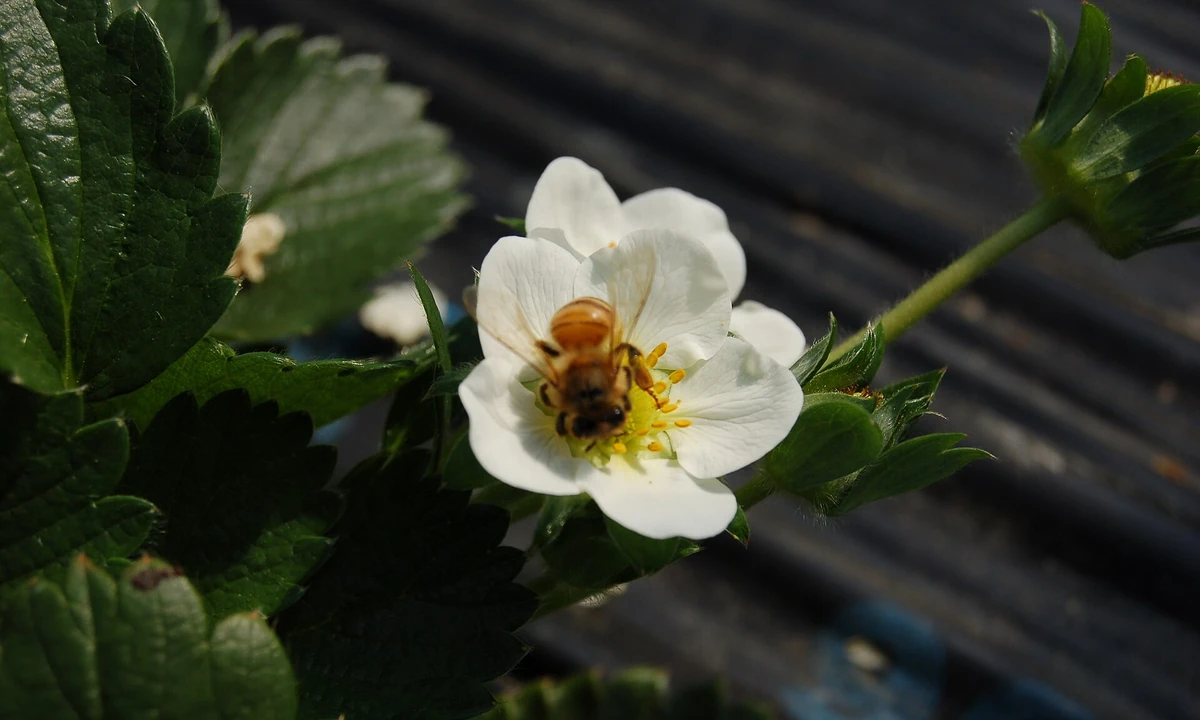
A practical approach is to leave the bed open through the main bloom, then close the netting as berries begin to ripen and turn from green to red. Everbearing and day-neutral strawberry plants can flower while older fruit is already turning red, so don’t assume pollination is finished just because you see fruit forming. Check whether the installed netting still lets visiting insects reach open blossoms. If it doesn’t, open a flap or roll back part of the cover during active bloom, then reseal it afterward so pollinators are never shut out from open flowers.
Peak ripening is also when daily picking matters most. Once the first berries begin to ripen, ripe strawberries can go from perfect to overripe in a couple of days, and overripe fruit left on the plant is exactly what draws hungry birds back for another look. Checking daily during peak ripening, rather than every few days, keeps the bed less interesting and gives you first pick of the best red strawberries before anything else does.
Match the Frame to How You Grow Strawberries
To protect strawberries well, however you grow them, whether in a snug garden bed tucked against a fence, a raised bed with wooden sides, or a wider open patch, the same cover principles apply, just scaled to your own garden space. A small bed or a single raised bed is usually simplest: a low hoop tunnel or a rigid frame can span the whole thing, and you only need one harvest flap to reach every plant. Gardeners working a wider strawberry patch often do better dividing it into sections with separate frames rather than trying to stretch one sheet of netting across the whole area, since a smaller span sags less and is easier to keep taut.
Small Bed, Raised Bed, or Open Patch
Gardeners who grow strawberries in a raised bed often find the frame easier to anchor than those working an open patch, since the bed’s own side boards give the hoops something solid to attach to and the base seal is more consistent from one season to the next. A ground-level patch needs the edges anchored into soil or held down with weights instead, and it’s worth checking that anchoring after every storm. Wherever you grow strawberries, the frame needs to hold its own shape independent of the netting; don’t rely on the mesh to hold the structure up, since it will sag under rain or wind and press against the fruit.
PVC Hoops and Low Tunnels
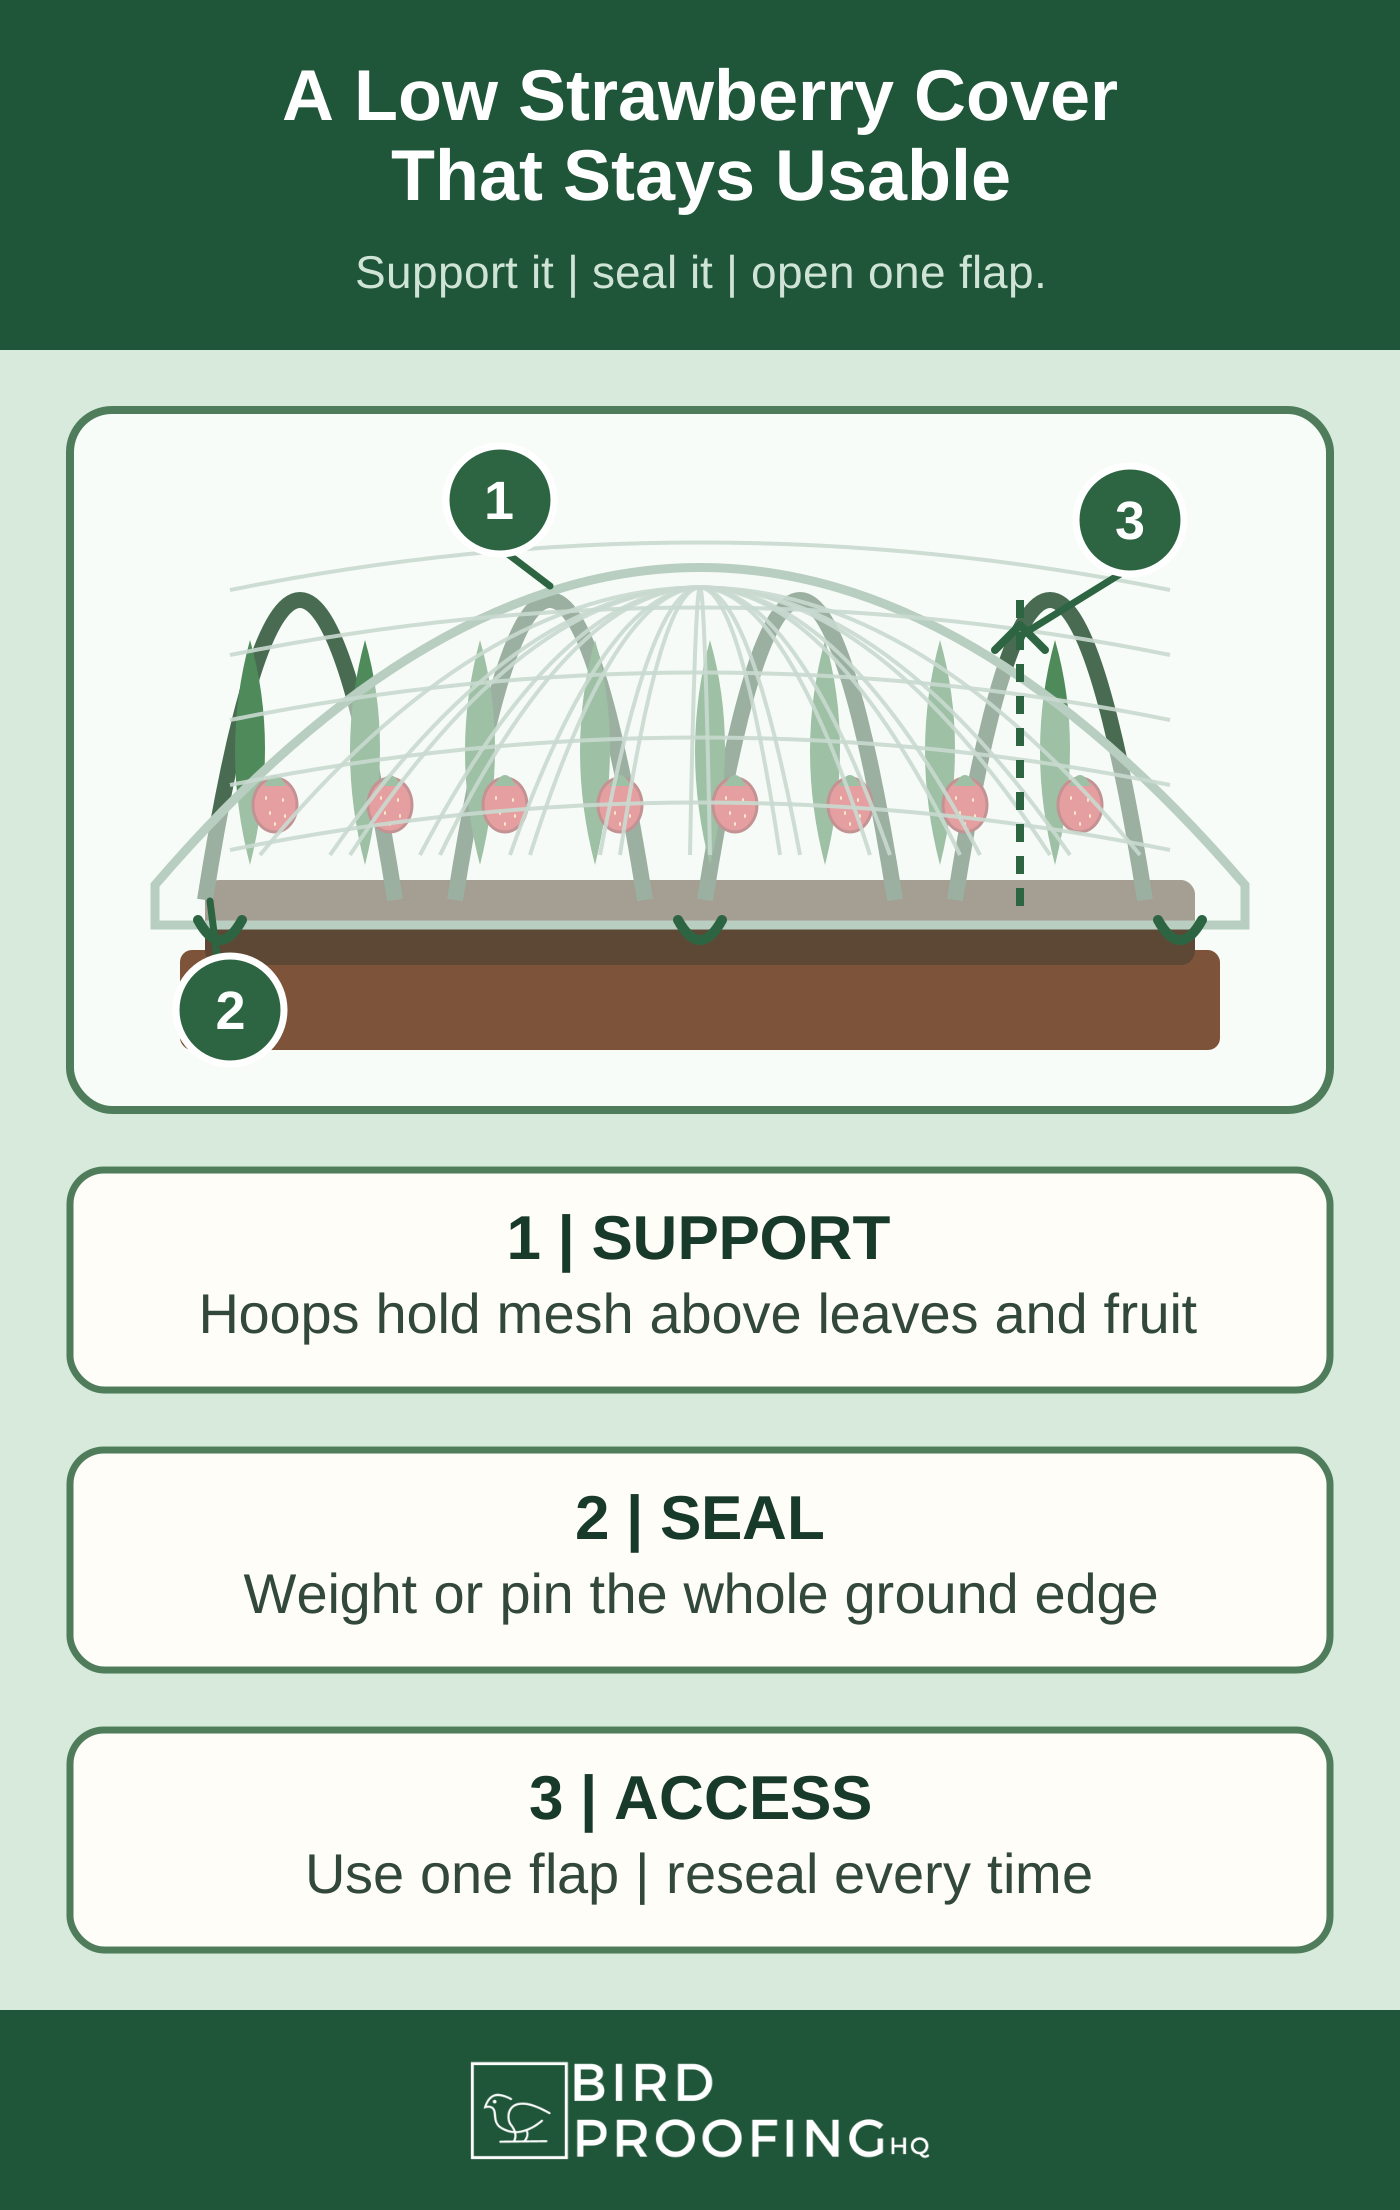
PVC hoops are a common, inexpensive way to build the frame for a home garden bed. Cut lengths of half-inch or three-quarter-inch PVC pipe, bend them into arches across the bed, and anchor each end into the soil or into a length of rebar driven in first so the hoop has something rigid to grip. Space the hoops closely enough that the netting between them doesn’t sag down onto the plants, and run a ridge piece or a length of twine along the top if the hoops themselves aren’t rigid enough to hold their shape under the netting’s weight. A rigid welded-wire cage works too, and it holds its shape better in wind, but PVC hoops are lighter, cheaper, and easier to take down and store between seasons.
The edges matter more than people expect. A gap of even a few inches at the base gives a bird an easy way in, and once inside, it can have a harder time finding its way back out. Seal the bottom edge continuously around the whole bed, either by burying it a little in the soil, weighting it down along its length, or pinning it with stakes set close enough together that nothing sags between them. Build in one flap you can open and close for daily access, rather than lifting or untying the whole cover every time you want to check the bed. For the general mechanics of mesh, frame materials, and seam techniques that apply across garden crops, see BirdProofingHQ’s guide to bird netting for vegetable gardens, which covers that material in more depth than a strawberry-specific piece needs to repeat.
Choose Plastic Mesh You Can Keep Taut and Inspect
To protect your strawberry patch, the netting itself needs to do two things well: keep the smallest bird causing you trouble on the outside, and stay taut enough that it never has slack pockets a bird could push into or get caught in. Most bird netting sold for home gardens is a lightweight plastic mesh, and the mesh size matters: openings small enough to stop sparrows and finches will also stop larger birds, so when in doubt, size the plastic mesh for the smallest bird species giving you trouble rather than the largest.
Slack netting is both less effective and more of an entanglement risk, since a bird that gets partway through loose mesh can struggle and tangle itself trying to get free. Choose a plastic mesh you can actually see against your strawberry plants, so you notice tears or sagging sections during a normal walk past the bed, and one durable enough to survive being taken down and put back up across a season. Dark-colored plastic mesh tends to disappear against green foliage, which makes it harder to spot a small tear before it becomes a bird-sized gap, so check darker mesh more carefully than a lighter, more visible one. The vegetable garden netting guide linked above goes into more detail on selecting and tensioning mesh if you want the fuller picture.
Check the Bed Daily While Protecting Strawberries From Birds
Once the cover is up, picking strawberries becomes a small daily routine rather than a casual stroll through the bed. Open the harvest flap, pick the ripe berries, and remove anything that’s clearly damaged or starting to rot so the next inspection is easier. Close and reseal the flap fully every time, even for a quick check, since a cover left cracked open defeats the purpose. Walk the full perimeter each day and confirm the ground seal is still tight and the netting is still taut, especially after storms or strong wind.
Harvesting on a schedule does double duty: it gets you the best fruit at its peak, and it removes the ripe strawberries that would otherwise be sitting there advertising themselves to any bird that wants to eat them. A bed picked clean of ripe fruit every day gives birds far less reason to keep testing the netting for gaps.
Layer a Rotating Set of Visual Deterrents While You Build
Reflective tape, spinners, and predator decoys can help with keeping birds off the fruit for a while, but treat them as a bridge while you get a cover built, or as a light supplement to one, not as your main protection. Penn State Extension recommends changing visual scare devices regularly and varying their locations, colors, and types. Rotating these devices helps prevent habituation instead of letting birds get used to one unmoving object. Oregon State University Extension backs this up, noting that birds tend to habituate to repeated visual deterrents, and recommending that growers combine tactics and rotate devices over time rather than relying on one.
A layered approach that combines a few different tactics works better to deter birds than any single device. In practice, that means moving a predator decoy every few days, swapping which section of tape catches the light, and not expecting any single device to keep working on its own for the whole season. Rotating two or three types of visual deterrents together, rather than relying on one, does more to prevent habituation than any single trick repeated endlessly. Treat this layer as what buys you time while the netting goes up, not as a long-term substitute for it. For a broader comparison of deterrent categories and where each one falls short, see BirdProofingHQ’s guide to bird deterrents.
Troubleshoot Gaps, Sag, and Repeat Damage
If damage keeps showing up after the cover is installed, home gardeners who protect a strawberry bed should work through the likely causes in order rather than guessing. Start at the edges: a gap under the netting is the single most common failure point, so check the full perimeter for spots where soil has shifted, a stake has loosened, or a weight has been nudged out of place. Next, check for sag. A netting panel that has dropped low enough to touch the plants gives birds a landing spot and a way to eat fruit right through the mesh, so re-tension it or add a support at the low spot. If the perimeter and tension both check out but damage continues, watch the bed at the time birds are likely feeding, usually early morning, to actually see how they’re getting in rather than guessing after the fact.
If damage continues even with a tight, gap-free cover, revisit whether it’s really birds. A cover built to keep out birds can also help with other pests, but if the marks don’t match the peck-and-cap pattern described earlier, the section below on non-bird damage is the next step before you assume the netting itself is failing.
When the Damage Isn’t From Birds: Checking for Other Pests
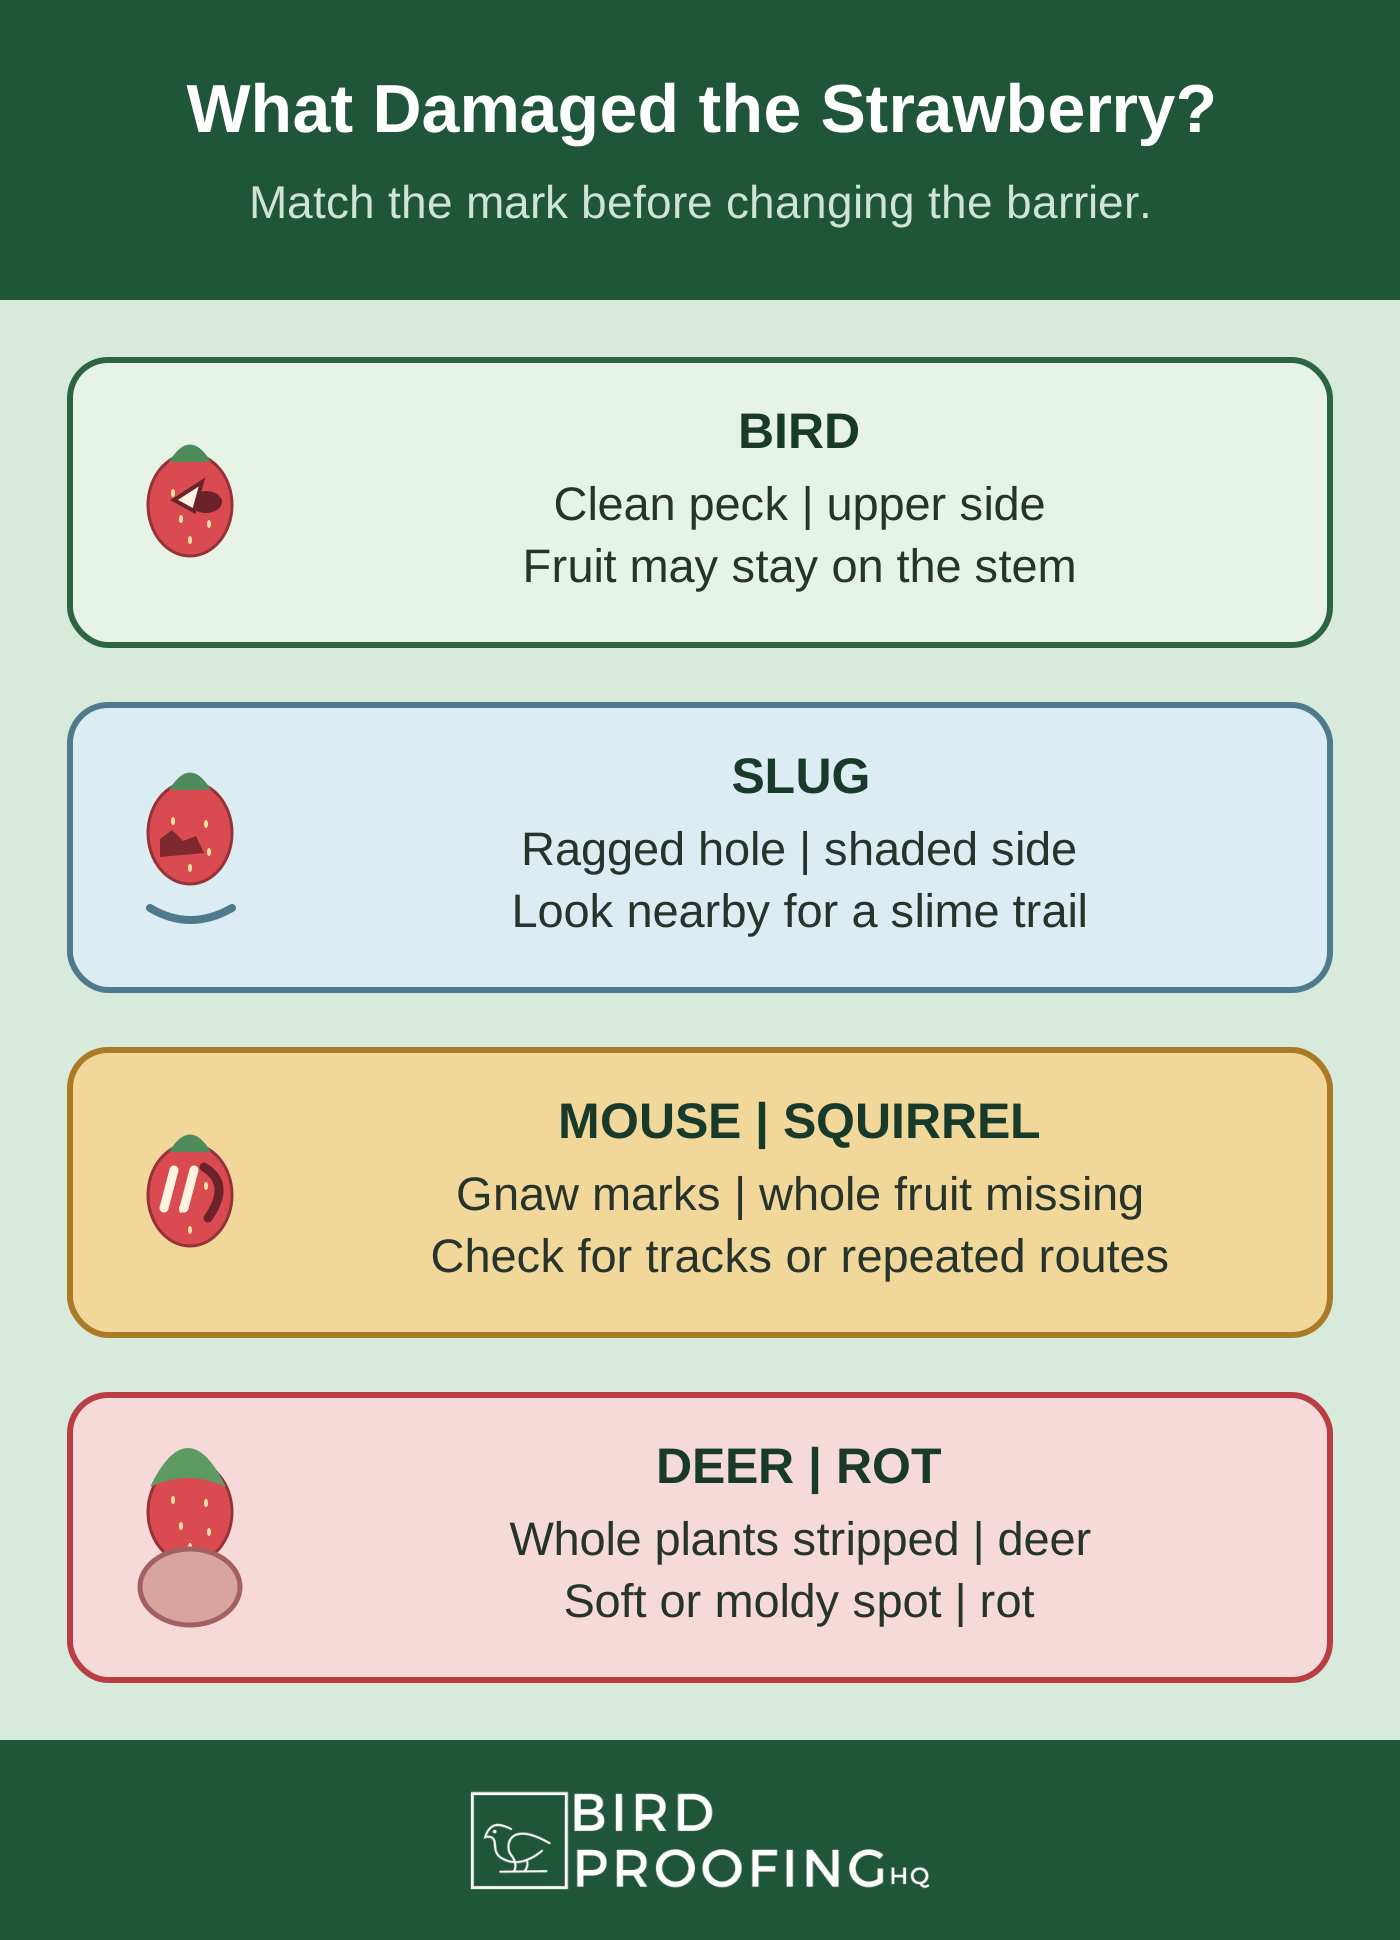
If the cover goes up and damage keeps happening, or the marks never quite matched a bird to begin with, it’s worth stepping back and checking for a different culprit. Slugs tend to leave ragged, irregular holes rather than a clean peck, usually on the shaded underside of the berry, with a slime trail on the fruit or nearby soil that’s easy to spot once you know to look for it. Mice and squirrels usually leave cleaner gnaw marks or take whole berries and carry them off, sometimes leaving small caches nearby. Deer damage tends to be larger in scale, with whole plants browsed down or stripped rather than individual fruit picked at. And not all bad-looking berries are pest damage at all; soft, discolored, or moldy spots with no bite marks usually point to rot or disease rather than an animal, and no amount of netting will fix that.
Since Oregon State University Extension already lists birds, deer, squirrels, and mice as common pests in a home garden, a cover built for keeping birds from eating your strawberries often helps with the others too. Confirm what you’re actually dealing with before you assume the netting alone is failing.
Keep the Method Humane and Legal
Everything in this article is built around exclusion and deterrence, not removal. Many bird species that go after backyard strawberries are native and protected under the Migratory Bird Treaty Act, which the U.S. Fish and Wildlife Service describes as prohibiting the taking of protected migratory birds, including killing or capturing them, without prior authorization. Lethal methods aren’t a legal option for most species eating your strawberries, and they wouldn’t solve the underlying problem anyway, since new birds move into a food source as soon as the old ones are gone. Exclusion is the solution that actually removes the incentive, which is why this article treats netting as the primary method and everything else as backup.
Trapping, injuring, or otherwise harming a bird eating your strawberries isn’t on the table. Keeping netting taut on a real support, sealing the edges continuously, and checking the bed often keep the method humane as well as effective, since slack netting can become an entanglement hazard.
If you find a bird loose inside the covered bed, open the harvest flap and step back to give it a clear path out; most will find their own way once the opening is there. If a bird appears tangled in the mesh or looks injured, don’t attempt to handle it yourself. Contact a licensed wildlife rehabilitator or your state wildlife agency instead. Once the season ends, take the netting down and store it rather than leaving it slack over an empty bed, both for its own sake and so it doesn’t become a hazard with no fruit left to protect. For a fuller explanation of which birds are protected and what that means for homeowners, see BirdProofingHQ’s guide to whether birds are protected by law.
Common Questions About Protecting Strawberries From Birds
What Is the Best Thing to Cover Strawberry Plants?
Use bird netting held above the strawberry plants on hoops or a rigid frame. Keep the mesh taut, seal every edge to the ground, and add one flap that can be opened for harvest and resealed afterward.
Will Backyard Birds Eat Strawberries?
Yes. Backyard birds eat ripe strawberries and often return to eat more berries as they ripen, usually leaving a clean peck or missing bite on the upward-facing side. Confirm those signs before building a barrier because slugs, mice, squirrels, deer, and rot leave different damage.
Is It a Good Idea to Put Bird Netting Over Strawberry Plants?
Yes. This is a good method for keeping birds out when the netting is supported above the plants, easy to see, sealed at the base, and checked daily. Keep open flowers accessible to bees, and never drape loose mesh directly over the fruit where birds can reach through or become tangled.
How Do I Protect Strawberry Plants From Other Animals?
Start by identifying the damage. A taut, sealed barrier can also stop mice and squirrels from eating the fruit, but larger browsing damage may need fencing, while slug damage calls for a different solution than bird netting.
Your Plan to Protect Strawberries From Birds, Start to Finish
If you’re starting from scratch in your own garden, follow these tips in order to protect strawberries from birds:
- Diagnose first. Look for a clean peck or missing bite on ripening fruit, with the cap often left behind. If the damage looks ragged, slimy, or like whole plants are gone, check the non-bird causes above before you build anything.
- Leave the bed open through bloom. Don’t cover flowering plants; pollinators need access to reach them.
- Build the cover before fruit turns red, sized to how you grow strawberries. A low hoop or rigid frame with continuous ground sealing and one harvest flap, installed as the first berries begin to color, beats scrambling once birds have already found the bed.
- Keep the netting taut and inspect it. Slack mesh is both less effective and a real entanglement risk, so tension and visibility matter as much as coverage.
- Use a layered approach for visual deterrents as backup only. Rotate tape, spinners, or predator decoys while the cover goes up, or as a light supplement, never as your only protection.
- Reseal every time you harvest. Pick, remove damaged fruit, and close the flap fully, even for a thirty-second check.
- Troubleshoot gaps and sag before assuming the method has failed, and walk the perimeter daily so small problems get caught before birds find them.
- Store the netting when the season ends, so the barrier stays effective, humane, and ready to reuse next year.
Photo credits: garden strawberry by Shixart1985, CC BY 2.0; strawberry flower and bee by Tatsundo h, public domain; strawberry harvest by Eden, Janine and Jim, CC BY 4.0. Photos were cropped and resized. The damage check, low-hoop plan, cover timing, and protection decision graphics are original BirdProofingHQ visuals.


.jpg)
Free: The 5-Step Bird-Proofing Checklist
Work through the right steps in the right order, before spending money on the wrong deterrents. Printable PDF, straight to your inbox.
No spam. Unsubscribe any time.