In this guide6 sections
Quick Answer
To repair woodpecker holes in siding, first confirm no bird, eggs, or young are inside. Fill small holes in wood siding with exterior-grade caulk or putty, finished to match. Larger damage needs a backed plug or a replacement board or panel.
In this article, you'll learn how to repair woodpecker holes safely. We'll cover checking for occupants, small and large patches, and preventing repeat damage.
Make Sure the Hole Is Empty Before You Touch It
A woodpecker hole can be a feeding probe, but it can also be a nest or a nighttime roost. Woodpeckers are protected under the Migratory Bird Treaty Act, which still allows methods that don’t harm birds or active nests, and some species carry extra protection as listed species. The Fish and Wildlife Service says control measures must wait while a nest is active, until the young leave permanently. So the first job is watching the hole, not repairing it.
Watch from a distance on more than one day, and at more than one time of day. A bird going in or out, a head showing at the opening, or sounds from inside all mean the hole is in use. A quiet afternoon proves little, since a bird can be gone during the day and come back to sleep in the cavity. Fresh wood chips on the ground or deck below suggest recent activity, so keep watching.
Never plug or cover a hole that might be occupied. If you can’t tell, leave it open and call your state wildlife agency or a qualified wildlife-control professional. A hole that stays open for a few more weeks costs far less than a trapped bird or a legal problem.
Read the Damage Before You Pick a Patch
The shape of the damage hints at what you’re repairing. Rows of small, shallow, cone-shaped holes usually mean the bird was foraging for insects, while a single deep, round hole is more likely a nest or roost cavity, and the bird may still be using it. That’s a clue, not proof. If you want to work out what the bird was after, why woodpeckers peck wood walks through the signs.
Before you patch anything, inspect the siding for insect damage and rotting wood. A hole doesn’t prove an infestation, but filling over a real one leaves the food source in place, and the bird has a reason to return. Press a screwdriver tip into the wood around each hole. Firm wood is a good sign. Soft, crumbly, or spongy wood points to rot and changes the repair.
Pick the Repair by Siding Material and Hole Size
Siding materials don’t take the same repair, so match the fix to what’s on your wall. The table gives the usual starting point once you’ve confirmed the hole is empty.
| Siding and damage | Usual repair | When to step up |
|---|---|---|
| Wood, small probe holes | Fill with exterior-grade caulk or putty, texture, and finish to match | Soft or rotted wood around the holes |
| Wood, larger hole, damage stays in the siding | Matching plug supported from behind, or replace the board | Damage spans several boards |
| Wood, hole opens into the wall | Contractor | Already a professional job |
| Fiber cement, vinyl, or aluminum | Replace the damaged board or panel following the maker’s instructions | Fiber cement replacement, or a profile or color that’s hard to match |
| EIFS (synthetic stucco) | Professional inspection and repair | Already a professional job |
Small Holes in Wood Siding
Small cone-shaped holes in wood can be filled with caulk, then textured and finished to match the siding. Choose an exterior-grade caulk or putty made for your siding, clear loose splinters first, and fill each hole completely. Work the surface so it blends with the grain or texture around it, then prime and paint as the product label directs. A smooth blob on grooved or rough-sawn siding will stand out, and a bare patch will weather faster than the boards around it.
Do the job soon after you’ve confirmed the hole is empty. Prompt repair can remove a visual cue, because open holes may attract the bird back, and it keeps rain out of the wall.
Larger Holes and Cavities in Wood
A big opening needs structure behind the repair, because filler alone has nothing to hold it. The usual fix is a plug of the same material and thickness, secured to backing or cleats, and extensive damage may call for replacing the siding.
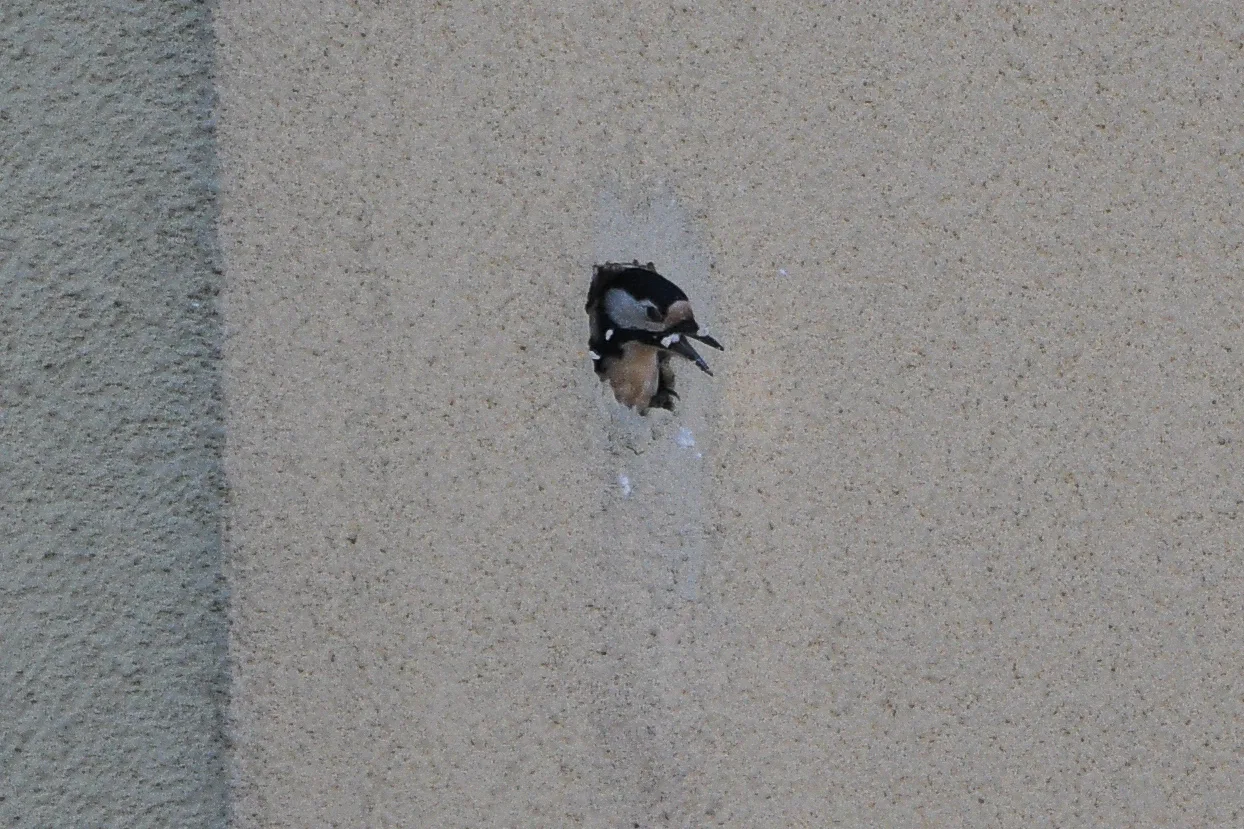
This plug repair is only for damage that stays within the siding. A nest cavity often goes all the way through, like the hole in the photo above, which opens into an insulated wall. If you can see or feel that the hole reaches the sheathing, insulation, or framing, stop and bring in a contractor.
Before you cut anything, remember that electrical wiring or plumbing may be under the board. Look for outlets, switches, light fixtures, hose bibs, and plumbing walls on the inside of the house near the hole. If any of them are close, or you aren’t sure what’s behind the siding, have a licensed professional look before you cut. Damage is often up on a gable or under the eaves, so use a stable ladder or hire the work out if you can’t reach it comfortably.
When the plug is in, seal the edges and finish it to match the wall. Replacing the whole board is the cleaner choice when the damage runs close to the board’s end, covers much of its width, or the surrounding wood is soft.
Fiber Cement, Vinyl, and Aluminum
The wood-siding filler advice doesn’t carry over to these materials. The sensible default is to replace the damaged panel or board, using the manufacturer’s installation instructions. Get the profile and color from the siding’s maker or a siding supplier. Vinyl and aluminum panels are realistic DIY replacements for a careful homeowner. Fiber cement is better left to a siding contractor. The same wiring and plumbing check applies before you remove anything.
When a Patch Is Not Enough
A cosmetic patch is fine when the damage is shallow, the wood is solid, and the hole stops at the siding. It’s the wrong fix when you find any of these:
- soft, rotted, or stained wood around the hole;
- holes that go through the siding to the sheathing, insulation, or framing;
- a single board with many holes, or damage that spreads across several boards;
- signs of insects that you can’t identify or treat yourself;
- wiring or plumbing near the work area.
Call a licensed contractor, or a pest professional if insects are involved. EIFS deserves its own warning. It’s a layered finish over insulation board, and a hole through it can let water in behind the surface. Don’t try to patch it yourself. Photograph the damage and have a qualified EIFS or siding professional inspect it.
Keep the Repair From Becoming the Next Target
A patch alone won’t keep the bird away. If insects or rot were the draw, fix them first. If the woodpecker is drumming or coming back to the same spot, exclusion is more dependable than static decoys, and netting is the most effective protection for a building. It should sit at least 3 inches from the siding and be pulled taut, with no loose pockets that can entangle birds. Install it only over holes you’ve confirmed are empty and repaired.
For the full range of deterrents and how to combine them, see how to get rid of woodpeckers. If you’re repainting the wall anyway, woodpecker deterrent paint covers what the evidence says about paint and stain.
Image: Woodpecker in a house wall by David Weiss, CC BY-SA 4.0. Via Wikimedia Commons. Photo resized and converted to WebP. The bird shown is a great spotted woodpecker, a European species.
Frequently Asked Questions
How do you fix woodpecker holes in siding?
First confirm no bird, nest, eggs, or young are inside. Then fill small holes in wood siding with exterior-grade caulk or putty, texture it, and finish it to match. For a larger opening, fit a matching plug supported from behind or replace the damaged board or panel.
Can I fill a woodpecker hole right away?
Only after you are sure it is empty. Woodpeckers are federally protected, and control measures have to wait while a nest is active, until the young leave permanently. If you cannot tell, leave the hole open and contact your state wildlife agency or a qualified wildlife-control professional.
What should I use to fill small woodpecker holes?
In wood siding, small cone-shaped holes can be filled with exterior-grade caulk or putty, then textured and finished to match. Use a product made for exterior wood and follow its label for drying and painting. Vinyl, aluminum, fiber cement, and EIFS need a different approach.
What if the woodpecker hole is large?
A larger hole usually needs more than filler. If the damage stays within the siding, cut out the damage and fit a plug of the same material and thickness, secured to backing or cleats, or replace the whole board or panel. If the hole opens into the wall, call a contractor. Check for wiring or plumbing behind the siding before you cut.
Do woodpecker holes mean I have termites or other insects?
Not necessarily. Rows of small holes often point to feeding, but the pattern is only a clue. Still, inspect the siding for insect damage and rot before you patch, because those conditions can keep drawing woodpeckers back.
Will repairing the hole stop the woodpecker from coming back?
Not by itself. Prompt repair can remove a visual cue and keeps rain out, but the cause still matters. Taut netting set at least 3 inches from the siding is more dependable than decoys, and some jobs need a professional.
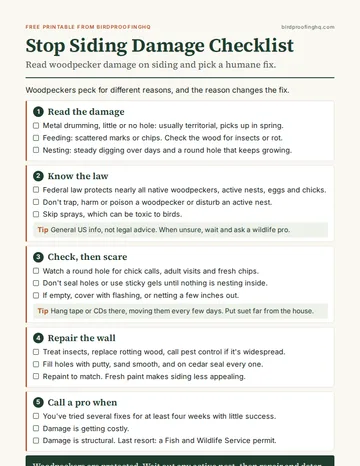
Free printable PDF
The Stop Siding Damage Checklist
Read the holes, work out why the woodpecker is there, and fix your siding in the right order without breaking the law.
Free. We email it to you right away.